

Pods are the smallest deployable objects in Kubernetes. A Pod can contain one or more containers. A pod running more than one container is considered as a single object and shares the network and storage resources among the containers.
In this article you’ll learn how to create a Pod in Kubernetes, view the current status of the Pod and finally how to delete the existing Pod.
Creating a Pod
A pod can be created either by running the command directly using the Kubeclt utility. This approach is known as Imperative configuration. The other approach is to define the pod resource in a manifest file and then applying those configuration to the Kubernetes cluster. This approach is known as declarative configuration.
Creating a Pod using imperative configuration.
The syntax to create a Pod using an image hosted in docker registry is “kubectl run <pod_name> –image=<image_name>:<image_tag>”
For example, to create a pod using a particular tag of nginx image, run the below command.
kubectl run nginx --image=nginx:1.23.3

This will create a pod named nginx in the default namespace, running with the specified tag of the nginx docker image.
To create a pod in a namespace other than default, follow the below steps.
- Create a namespace, if it does not exist.
- Create the pod.
kubectl create ns demo
kubectl run nginx --image=nginx:1.23.3 --namespace demo

Creating a Pod using declarative configuration.
To create a pod using the declarative approach create a manifest file “pod.yaml” which contains the pod configuration as defined below.
apiVersion: v1
kind: Pod
metadata:
  name: nginx
spec:
  containers:
  - name: nginx
    image: nginx:1.23.3
    ports:
    - containerPort: 80
The next step is to apply this manifest file to the Kubernetes cluster using the kubectl utility.
kubectl apply -f pod.yaml
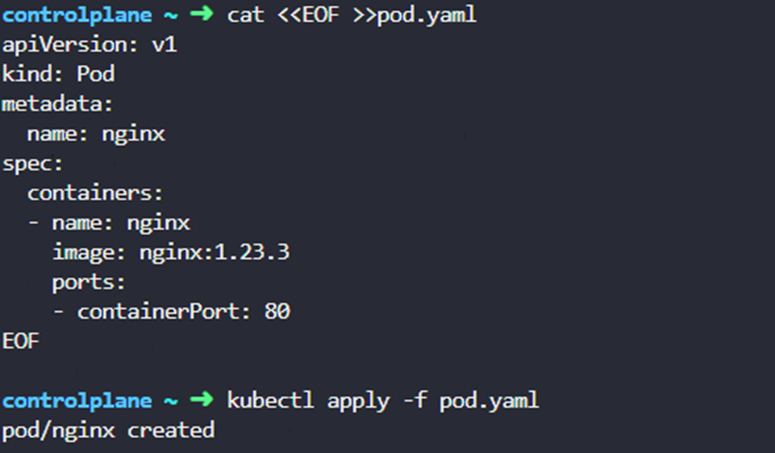
This will create a pod named nginx as defined under metadata.name using the nginx docker image with the tag value 1.23.3 as defined under spec.containers.image.
Viewing a Pod
To view the current status of the Pod run the “kubectl get pods” command.

To get a detailed description of the pod run “kubectl describe pod nginx”. The output will contain the name of the pod, node on which the pod is deployed, status of the pod, image used for the creation of container. At the bottom you’ll see the events triggered in order to create the pod.
Deleting a pod
Deleting a pod in Kubernetes is similar to creating a pod. You can use either the imperative approach or the declarative approach to delete a pod.
Deleting a pod using imperative approach.
To delete a pod simply run “kubectl delete <pod_name>” command. This will remove a pod in the default namespace.
For example, to delete the nginx pod that we created earlier run the following command.
kubectl delete pod nginx

Deleting a pod using declarative approach.
To delete a pod simply run “kubectl delete -f <manifest_file_path>”. This will remove all the resources defined in the manifest file.
For example, to delete the nginx pod that we created using the pod.yaml manifest file, run the below command.
kubectl delete -f pod.yaml

You can verify the deletion of pod by running the “kubectl get pods” command.
Lifecycle of a Pod
Pods are ephemeral as they are not designed to run forever. When a Pod is terminated it cannot “heal” or repair itself. For example, if a Kubernetes node fails, the Pod running on it is deleted.
During its lifecycle, a Pod can be in one of the following phases:
- Pending: Pod has been created and accepted by the cluster, but the containers are still not running yet. While in this phase, the Pod is usually being scheduled on a node and downloading images.
- Running: Pod has been scheduled to a node, and all of the containers have been created.
- Succeeded: All containers in the Pod have terminated successfully.
- Failed: All containers in the Pod have terminated, and at least one container has terminated in failure. A container “fails” if it exits with a non-zero status.
- Unknown: The state of the Pod cannot be determined.
Pingback: Kubernetes: What is a ReplicaSet – Learn and Implement DevOps